Makeup, as well as fashion, is often the mirror of its era. Eyes, lips, nails makeup have changed as much as fashion during the decades not only in colors but also in shapes and application methods.
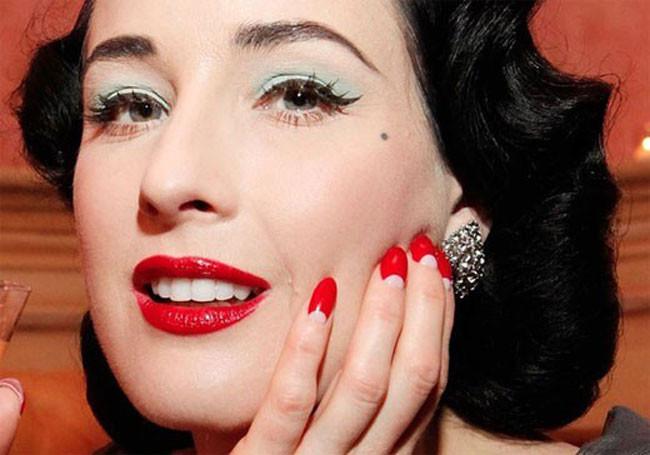
One of my favorite trends from the past is definitely the moon manicure, the way of painting nails during the ‘30s and ‘40s with bare half-moons on the bottom of the nails. Dita Von Teese is nowadays the queen of this manicure style! This retro trend had a huge comeback lately on runaways and fashion magazines but I still prefer the original version of the past. Another option is to paint with a different color the moon.
As soon as my nails are long enough (which is very hard to get as they break very easily) I try this lovely manicure myself and I really adore the final effect. Indeed it is important that your nails are long enough to try this style as it tends to foreshorten your nails.
For a more retro effect you can shape your nails into oval shape and use classic red polish; if you prefer a more modern twist try dark red and shape your nails into a less oval shape.

If you want to try it yourself I can show you two different methods to get a perfect moon manicure in 5 steps! (Warning: it is quite difficult and personally it took A LOT of practice to get good results so don’t worry if the first attempts are not exactly what you expected; just don’t give up!)
Method one (for beginners)
- Start your standard manicure by taking care of your hands and cuticles and by shaping your nails as you desire;
- Paint your nails with a basecoat;
- Apply ready-to-use French manicure arch-shaped stickers (just apply them on the base instead of the tips);
- Apply your desired polish color in two coats;
- When your polish is perfectly dry you can remove the stickers and apply top coat.

Method two (for advanced users)
- Start your standard manicure by taking care of your hands and cuticles and by shaping your nails as you desire;
- Paint your nails with a basecoat;
- Paint your nails twice with desired color trying as best as you can not to paint the half-moons ( I know, that’s the hardest part!);
- With a fine-pointed makeup brush (the best one would be the eyeliner brush) dipped in some nail polish remover try to remove the bits of color in the moons and re-create the original half-moon. Don’t forget to wipe the brush every time you use it;
- When the shape of your moons are clean you can apply top coat.

See you next year with a new story of The Vintage Series!
Vintage Love,
TLC
Vintage Love,
TLC
If you want to know more about me or contact me you can visit my blog www.theladybugchronicles.com, like me on Facebook (www.facebook.com/vintagetlc ), follow me on Twitter (www.twitter.com/TheLadybugC ) and Instagram (www.instagram.com/theladybugchronicles).